Today begins the series on importing data into SQL Server 2005/2008 using the various built in tools. With SQL Server, there are several ways of getting your data from one place to another. Today, we will focus on using the wizard from SQL Server Management Studio. Before we begin, I am using a simple database called testdb. I am also using a country code file found at http://www.andrewpatton.com/countrylist.html. The file contains the 2 and 3 character ISO 3166 Country Code abbreviations, which we will use in our sample.
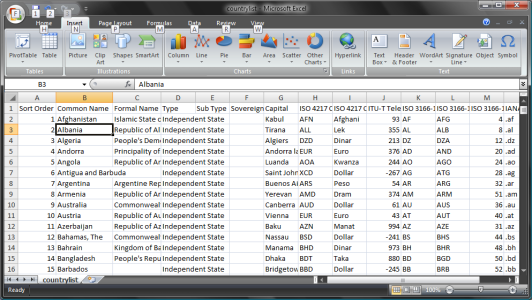
- The CSV file as seen in Excel 2007
Here is the script for the table that I will use in these samples.
create table dbo.countrylist
(
	CountryID		int	IDENTITY(1,1)
	,CountryName	varchar(50)	NOT NULL
	,CountryCode2	char(2)	NOT NULL
	,CountryCode3	char(3)	NOT NULL
	,lastUpdated	smalldatetime NOT NULL default getdate()
)
As you can see, the sample table does not include all of the columns from the sample file. In this example, we will only focus on the required columns. Though, you will soon see that the other columns matter, as well.
First thing, open up SQL Server Management Studio. From there, right click on the target database. Note, you are right clicking on the target table, but the entire database. From there, point to Tasks then Import Data.
You may get a Wizard introduction page. You can safely click next, if you do see the introduction page. From there, you will get a screen prompting you to select a datasource. Find the Flat File source in the Dropdown box.
From there, you will use Windows Explorer to navigate to the sample file. Ensure that you have selected CSV as the filetype, instead of TXT, since the sample file is a CSV file.
After selecting the file, ensure that you have Column Names in the First Data Row checked. This means that the file contains the column names. If this is unchecked, SQL Server will try and import the header row into the database, which is not desired. In this sample, we will also give a Text Qualifier of ” because some of the names are wrapped in quotation marks.
Next, you will inspect the file columns in the Columns section of the Data Source page. SQL Server let’s you review the first 100 columns.
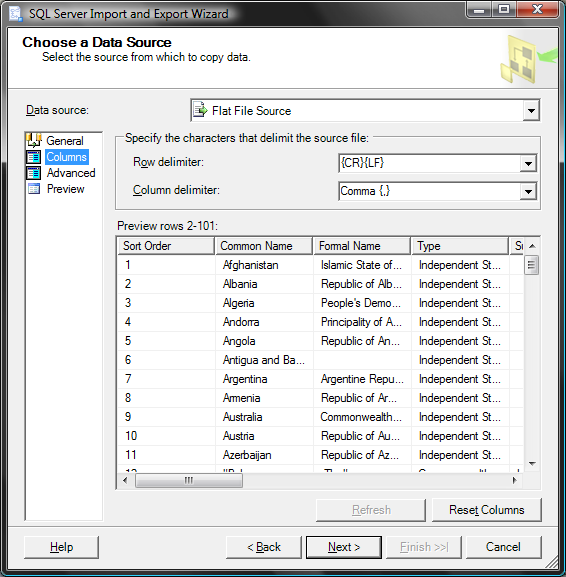
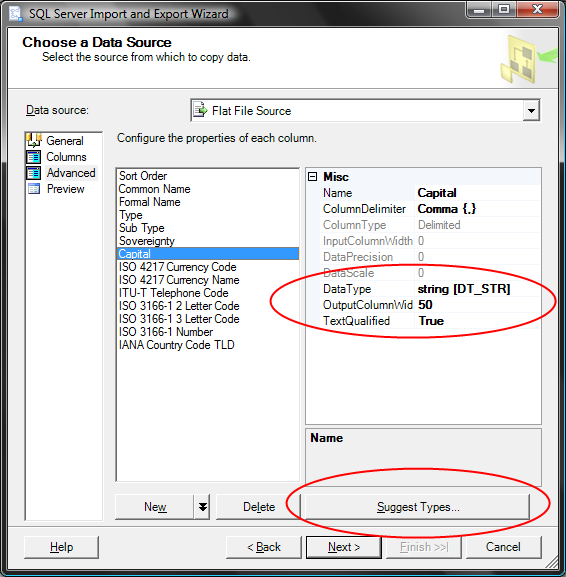
After reviewing the columns, you will examine the more advanced options. This is key because in this sample, we have a few items to take care of before importing the file. We see that, by default, SQL Server has assigned strings a length of 50.
Some of the columns in the file are larger that 50. Now, rather than going through and finding out what columns have what length, we will let SQL Server inspect the file by using the Suggest Types button.
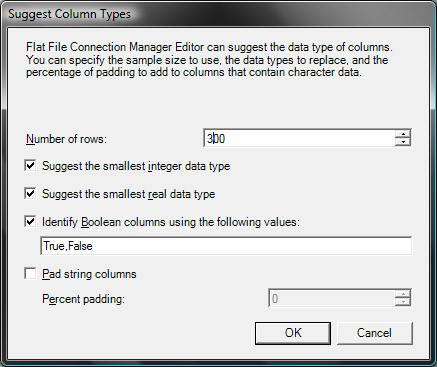
By Default, SQL Server will examine the first 100 rows and then give suggested types for each column. Since this file is rather small, we will examine the whole file. We find that the Capital column went out to over 60 characters!*
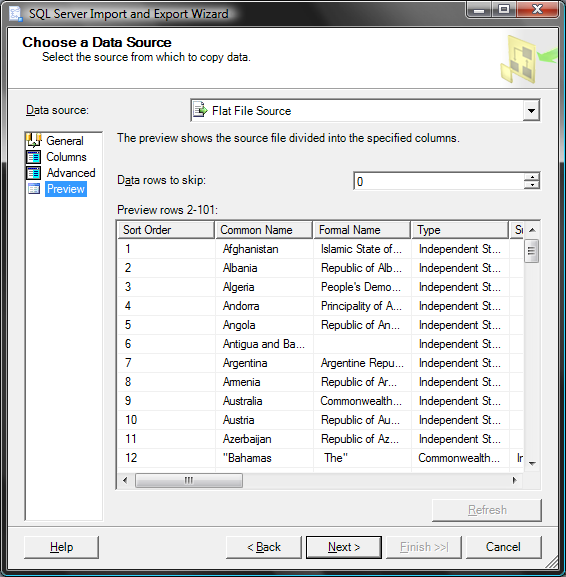
We will then examine the columns one last time using the Preview section of the Data Source page.
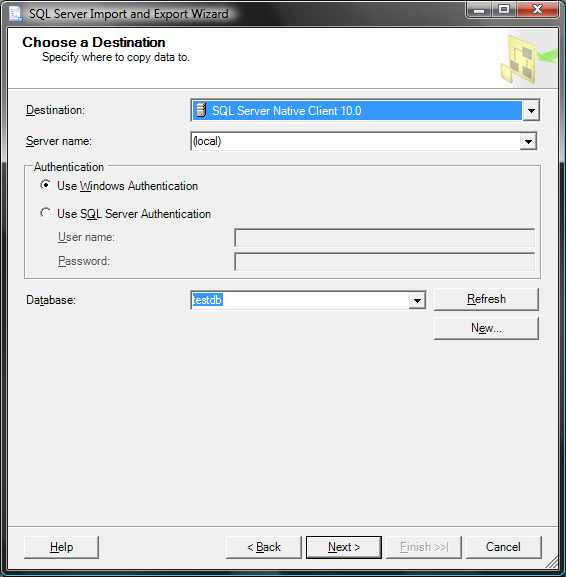
Once we are satisifed with the import preview, we will select the destination database.
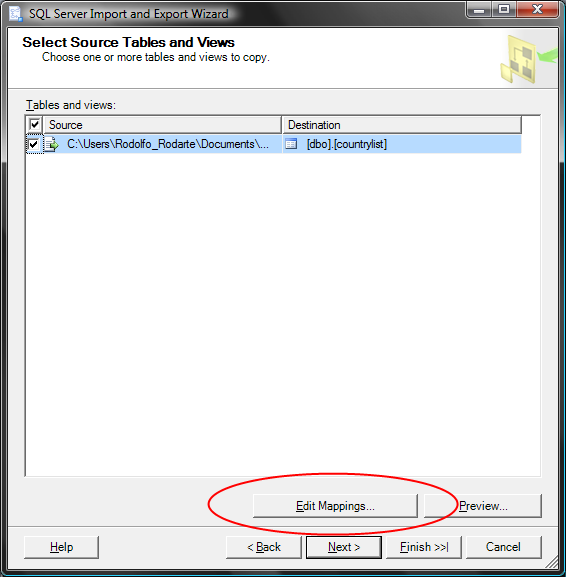
From here, we will select the destination table. As you since the file and destination table are named the same, we do not have to take any action; The desired table is already selected for us. However, if the table did not exist, we have the option to create the table. We can also select a different table in the database. All we have to do is click on the destination column to select the desired table.
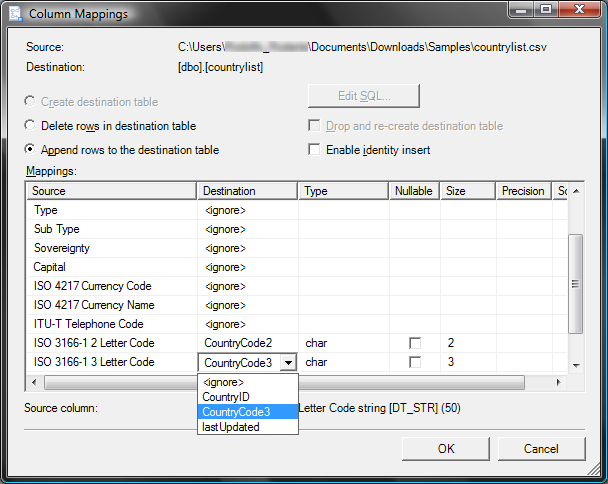
Since our table uses column names that differ from the column names in the file, we have to edit the source and destination mappings to ensure the data goes in the correct location.
In this example, the ID column and the lastUpdated column are automatically generated, so we will not worry about those. We will, however, map the country name, the ISO 2 and ISO 3 abbreviations. We will also ignore the remaining columns. We will then click OK and next.
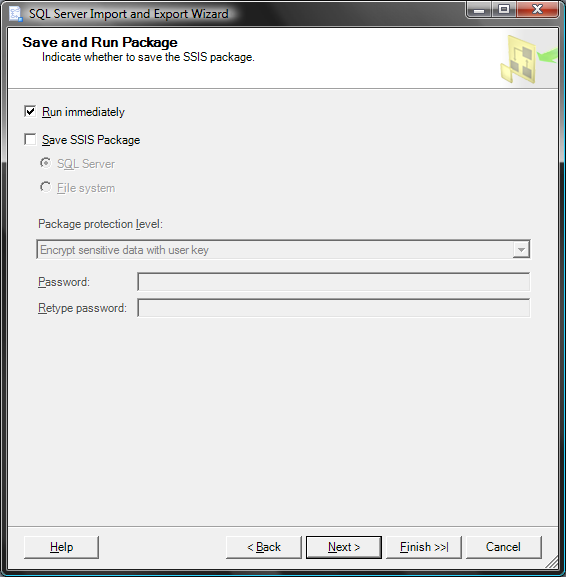
We then presented with the option to save the actions as an SSIS package. We will leave the Save as option unchecked and click next.
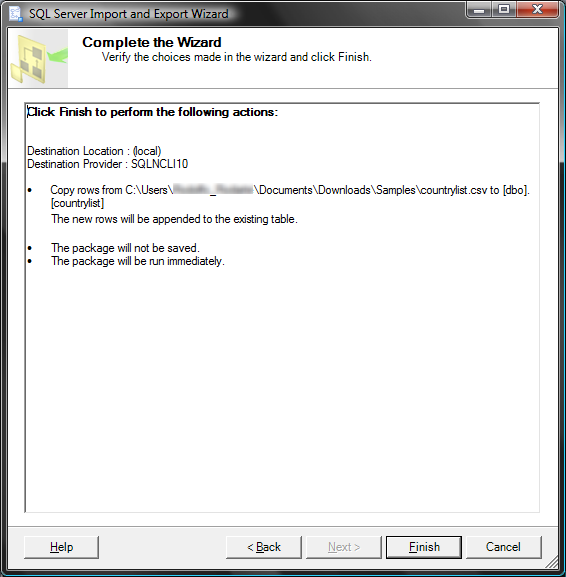
Lastly, we will see a verification screen, which explains all that we are about to attempt. If everything looks good, we can execute the Import by clicking on Finish.
We now get to watch the magic happen. The file will import successfully and you will see the number of rows processed. You will also notice some validation warnings.
For the most part, this is SSIS(see below) complaining about the possible truncation of data. You can review these warnings if you wish.
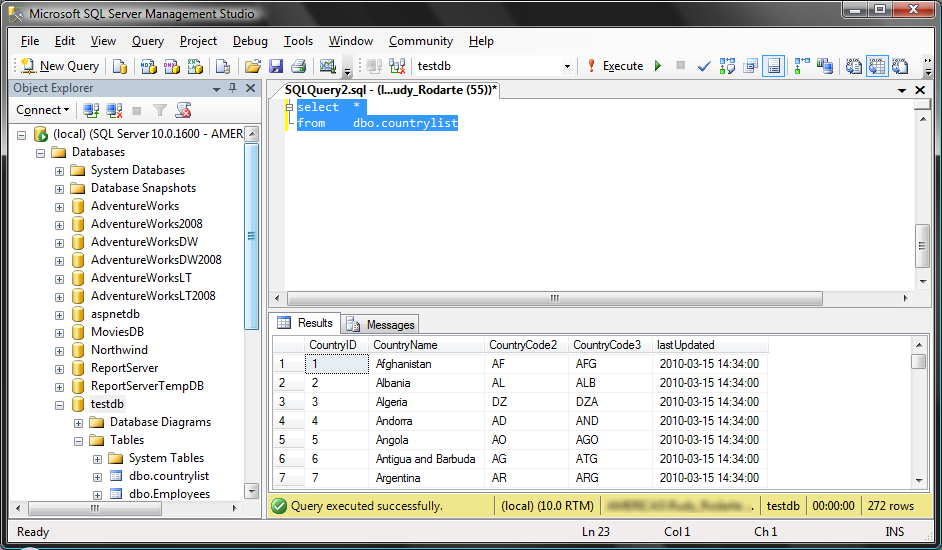
With the import complete, we can query the table and see if the data imported correctly.
And the data looks good! Congratulations! You have imported data via the Import Export Wizard.
* From what I can tell, the Import Export Wizard actually creates an SSIS package that executes the import. By default, SSIS packages are set to fail on truncation and you do not have to option to ignore truncation when you use the Import Export wizard method. In this sample file, some of the columns are longer than the default String 50, which causes the entire import to fail. This even goes for columns that are ignored in the Source-Destination mapping. When defining your source columns, make sure the String types are long enough before attempting an import.

